Getting started
Pluto Ads is where your team drafts, reviews and publishes Meta ads, automates the work with loops and hands tasks to the Agent. This page covers signing in, the first steps, finding your way around and what each role can do.
Signing in
Open the sign-in page and choose Continue with Google, Continue with Microsoft, or enter your email and select Continue with email. With email, we send you a 6-digit code. Type or paste it and the form continues on its own, or select Verify and continue.
- Resend code becomes available again after 30 seconds.
- Use a different email takes you back to the email field.
- Signing in and creating an account are the same step. The first time you sign in, we create an organization for you with one workspace, named after your first name ("Anna's workspace"), with you as its owner. If you were invited, you join the organization and workspace that invited you instead.
- A new organization starts a 14-day free trial, no card needed: one workspace, AI usage for the Agent and loops, and 50 GB of media. Owners and admins see the days left at the bottom of the sidebar, with Get Pro to choose a plan. See Billing.
A session lasts 30 days on that device. Signing in needs a connection. Once you're in, the app keeps working offline on that device (see Collaboration).
To sign out, open the account menu (your workspace's name in the top bar) and select Sign out. We clear what the app stored on the device for you.
Your first steps
The Getting started checklist at the bottom of the sidebar lists the steps that make Pluto Ads useful. It starts folded as a small pill that shows your progress, for example Getting started 2/5. Select it to open the list:
| Step | Where it takes you | Done when |
|---|---|---|
| Connect Meta | Integrations | Your workspace has a Meta connection. See Connect Meta. |
| Invite members | Members settings | Someone else has joined. Shown only to organization owners and admins. See Members. |
| Create a launch | Launches | The workspace has a launch. See Launches. |
| Build a loop | Loops | The workspace has a loop. See Loops. |
| Ask Agent | Home | You've started a chat with the Agent. See Agent. |
Each step ticks itself off when it's done. The menu on the card has Mark all as completed, and Get help getting started to book a call with us. The checklist disappears once every step is done.
The first time an owner or admin opens Home, the top bar asks Who is Pluto for?: My brand, Several brands or Clients (agency). It's optional and only tunes a few words in the app, for example Add client instead of Add workspace. It never changes how your organization works. Change it later under Pluto is for in your organization's General settings. These guides always say "workspace".
Finding your way around
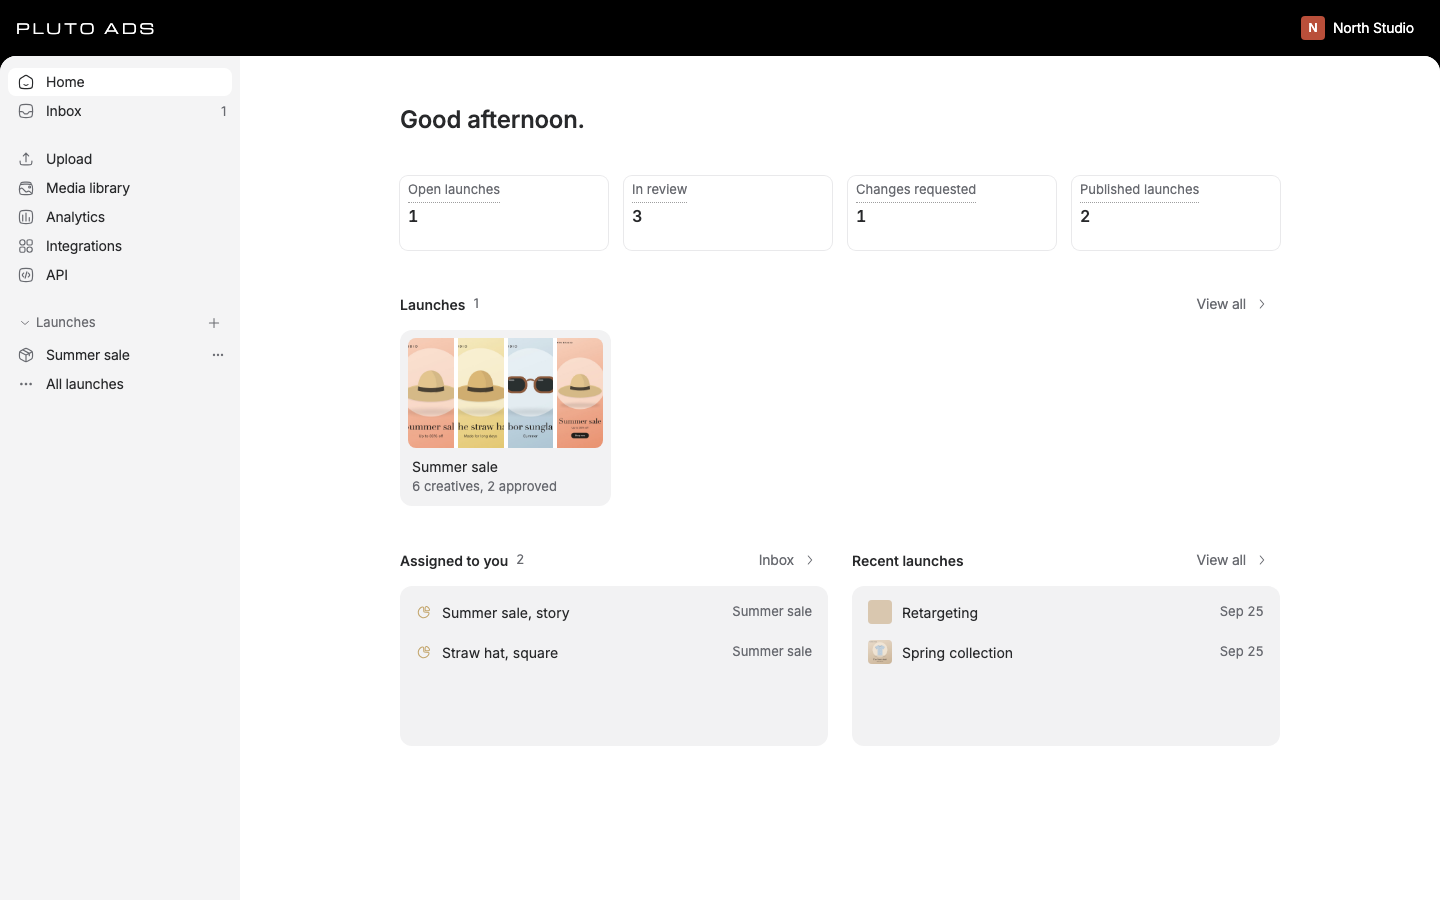
The sidebar has the places you use every day:
| Item | What it's for |
|---|---|
| Home | Ask the Agent, see counts of open launches, creatives in review and with changes requested, and published launches, your draft launches, what's assigned to you and recent launches. |
| Inbox | Mentions, replies, review requests, status and assignment changes that concern you. See Collaboration. |
| Launches | Opens your most recently changed draft launch, or offers Create launch and Import from Meta when you have none. See Launches. |
| Media library | The images and videos your ads use, in folders. See Media library. |
| Analytics | Results from Meta across the workspace. See Analytics. |
| Loops | Automations that watch your ads and act for you, with templates to start from. See Loops. |
| Integrations | Meta, Slack and Pluto Profit. See Connect Meta. |
| API | API keys, webhooks and agent credentials. See Developers and Agents. |
Below them, Launches lists your five most recently changed launches that aren't published. Select All launches for the rest: it has an Active and an Archived view. The plus button (New launch) starts a new one.
The Agent's composer sits at the bottom of every page ("Do anything"), except in the loop builder, which has its own. See Agent.
In the top bar:
- Activity shows uploads and other work in progress, with Cancel and Retry where they apply.
- The sync status says whether your changes have reached everyone (see Collaboration).
- The account menu (your workspace's name) lists your workspaces when you have several, Add workspace, Organization settings for owners and admins, a Dark mode switch, Settings, Account and Sign out.
Press Cmd+K (Ctrl+K on Windows and Linux) to open the command palette: go to any page, switch workspace or open settings by typing.
Settings
Settings starts with My account, the same in every workspace: Profile and Connected agents. Your workspace's pages follow under its name: General, Members, Audit log (admins), Notifications and Agent (yours, in this workspace), API, Statuses, Tags, Meta defaults, Copy templates and Usage. When your organization has several workspaces, owners and admins also see the organization's pages under its name: General, Members, Workspaces, API access, Plan & billing, Usage and Spending. With one workspace, the billing pages come last. Back to app leaves settings.
Inviting teammates
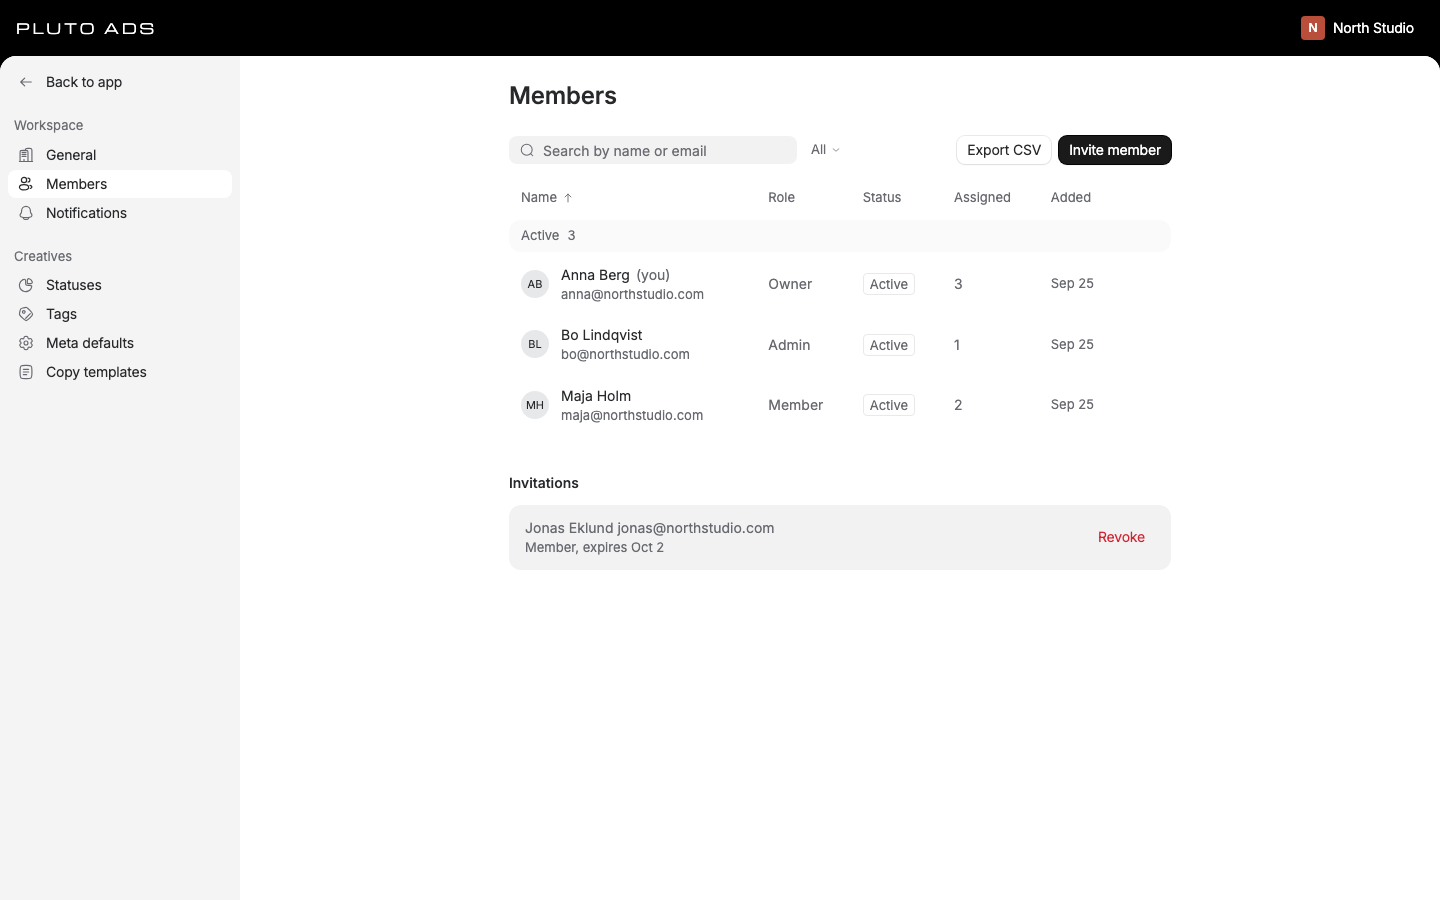
Organization owners and admins invite people from Members in settings, or from Invite members at the bottom of the sidebar:
- Select Invite.
- Choose Invite as: Member or Guest, and enter their Email and, optionally, their Name.
- For a member, choose a Role and, with several workspaces, which ones they may open.
- Select Send invitation.
They get an email with a link to join. An invitation expires after 7 days. Members take a paid seat, and the dialog shows what one adds; guests are free. Workspace admins can invite guests to their workspace too. See Members and Guests.
Roles and permissions
Everyone has one of four roles. The API checks the same rules on every request, whether it comes from the app, a script or an agent.
| Guest | Member | Admin | Owner | |
|---|---|---|---|---|
| View launches, ads, media and results | Shared launches only | Yes | Yes | Yes |
| Comment, approve or request changes | On shared launches | Yes | Yes | Yes |
| See internal comments, loops, the Agent and analytics | No | Yes | Yes | Yes |
| Draft launches, upload media, build loops, use the Agent | No | Yes | Yes | Yes |
| Publish to Meta, pause, change live budgets | No | Yes | Yes | Yes |
| Sync Meta, import from Meta | No | Yes | Yes | Yes |
| Edit statuses, tags, copy templates, Meta defaults | No | Yes | Yes | Yes |
| Connect agents for themselves | No | Unless an admin turned it off | Yes | Yes |
| Connect or disconnect Meta, change an ad account's spending limit | No | No | Yes | Yes |
| Invite and manage people, rename the workspace, change its logo | No | No | Yes | Yes |
| API keys, webhooks, the audit log | No | No | Yes | Yes |
| Plans, billing, seats and workspaces | No | No | Organization admins | Yes |
| Grant or remove ownership | No | No | No | Yes |
Guests are free: invite your clients to review and approve without buying a seat. They see only the launches shared with them, in the workspaces they're invited to, and never your internal comments. See Guests.
When you can't do something, the control is disabled and says why. Publishing spends money, so members can publish too; limit who does it with your review workflow (see Publishing).
An organization always keeps at least one owner. To step down as the last owner, make someone else an owner first. See Members.
Workspaces
A workspace holds one store, brand or client: its launches, media, loops, integrations and people. Nothing is shared between workspaces. Each API key and agent belongs to exactly one.
- Switch: open the account menu and select another workspace.
- Add: owners and admins select Add workspace in the account menu. Your plan sets how many you can have. See Workspaces.
- Rename and logo: in Settings > General, admins change the name and upload a logo: PNG, JPG or WebP up to 2 MB. Remove logo takes it off.
Your organization holds your workspaces, your people and your plan. See Organization.
Next steps
- Connect Meta, so you can load ad accounts and publish.
- Upload images and videos to the Media library.
- Create your first launch: see Launches.
- Start a loop from a template: see Loops.
- Ask the Agent to do the rest.
Good to know
- A new workspace starts with four review statuses: Not started, In review, Approved and Changes requested. Change them in Settings > Statuses.
- Invitations are sent by email through our sign-in provider. If someone didn't get one, check the address, then revoke and invite again.
- If you sign in with a different method than the one you signed up with, and the email already belongs to that other sign-in, we refuse with "This email already belongs to another sign-in. Use the method you signed up with."